 QuickBooks Tip:
Unless and until your business is swimming in cash, there will come a time that you have to make a big purchase and *gasp* get a loan. The horror.
So now that you’ve done what you had to do by getting a loan for that big purchase, you have to keep track of it and the balance somehow. Most loans are amortized – meaning a different amount of the payment is applied to interest and principal. In the beginning, more of the payment goes towards interest and less to the principal. By the end, almost all of the payment goes towards the principal.
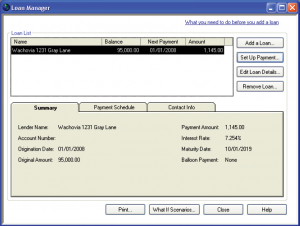
Keeping track of an amortized loan could be a headache…if you didn’t have QuickBooks and if QuickBooks didn’t have Loan Manager.
Note: Before jumping right into Loan Manager, you need to create a few accounts. You will need a liability account for the amount of money you owe and an interest expense account. If this is a loan for real estate, you will also need a current asset account to track your insurance and tax escrows.
Basic Setup
- Open Loan Manager: from the menu bar select Banking ->Loan Manager
- Click “Add A Loan”
- Account: choose the LIABILITY ACCOUNT you created for the loan from the dropdown menu
- Lender: choose the VENDOR you created for the lender from the dropdown menu
- Origination Date: select the date that matches the origination date on your loan documents (this is important because Loan Manager will use it to calculate the number remaining payments, interest you owe ad when you’ll pay of the loan).
- Original Amount: input the total amount of the loan
- Terms: specify the length of the loan …
- Click NEXT to advance to next section
Payment Information
- Due Date of Next Payment: input next payment date
- Payment Amount: input the total payment for principal and interest
- Payment Period: select frequency from the dropdown menu
- Reminder: If you want an alert 10 days prior to your payment due date, checkmark the box
- Click NEXT to advance to the next section
Interest Rate Information
- Interest Rate: input the interest rate of the loan
- Compounding Period: choose either Monthly or Exact Days (your lender can tell you what calculation type they use but most lenders use “exact days” or 365/365).
- Payment Account: select the bank account you will use to make your payments from the dropdown menu
- Interest Expense Account: select the account you use for fees and late charges from the dropdown menu
- Click FINISH.
Once setup properly, you would go to Loan Manager to make loan payments (either by writing a check or creating a bill). There is one downside to the fabulousness of Loan Manager. You can’t create recurring bills. It’s for that reason that I would strongly advise you to click the checkbox for the 10 day reminder/alert (Payment Information Step 4).
That’s it. Done. Now go conquer QuickBooks!
Have questions or need more help? Contact me and my team or Bruce. We are QuickBooks ProAdvisors and would be happy to help.
Joyce M. Washington, CPA – Joyce is a CPA who has spent the better part of almost 20 years honing her craft as an accountant with various companies in the Greater Baltimore-Washington, DC area – growing, mentoring and managing accounting teams. It’s this experience that she brings to services and training programs, including QuickBooks Basics To Mastery.
Website: http://www.thecommoncents.com
Facebook: http://www.facebook.com/thecommoncents
Twitter: http://www.twitter.com/thecommoncents
Related articles
© 2012, Bruce Mc. All rights reserved.


